Installation Instructions
Ductile Iron Water & Sewer Pipe
TYTON JOINT Pipe
Assembly Instructions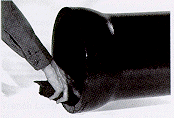
1. All foreign matter in the socket must be removed, i.e., mud, sand, cinders, gravel, pebbles, trash, frozen material, etc. The gasket seat should be thoroughly inspected to be certain it is clean. Foreign matter in the gasket seat may cause a leak. Do not lubricate the inside of the bell,
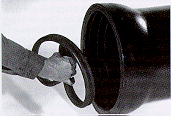 2. The gasket
must be wiped clean with a clean cloth, flexed, and then placed into the
socket with the rounded bulb end entering first. Looping the gasket in
the initial insertion will facilitate seating the gasket heel evenly around
the retainer seat. Smaller sizes require only one loop. With larger sizes
it will be helpful to loop the gasket at the 12 o'clock and 6 o'clock positions.
When installing TYTON JOINT pipe in subfreezing weather, the gaskets, prior
to their use, must be kept at a temperature of at least 40'F by suitable
means, such as storing in a heated area or keeping immersed in a tank of
warm water. If the gaskets are kept in warm water, they should be dried
before placing in the pipe socket.
 3. The seating
of the gasket may be facilitated by flexing the gasket on one or two points
depending on size and then pressing the bulge or bulges out.
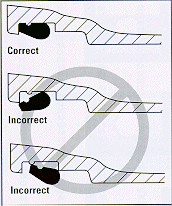
4. The inner edge of the retaining heel must not protrude from the retaining
bead of the socket.
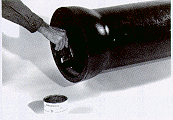 5. A thin
film of pipe joint lubricant should be applied to the inside surface of
gasket which will come in contact with plain end of the pipe.
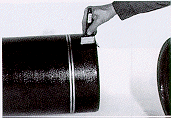 6. Be sure
that the plain end is beveled; square or sharp edges may damage or dislodge
the gasket and cause a leak. The plain end of the pipe must be cleaned
of all foreign matter on the outside from the end to the stripes. Frozen
materials may cling to the pipe in cold weather and must be removed. In
all cases, it is desirable to apply a thin film of lubricant to the outside
of the plain end for about 3" back from the end. Do not allow the plain
end to touch the ground or trench side after lubricating since foreign
matter may adhere to the plain end and cause a leak. Lubricant other than
that furnished with the pipe should not be used.
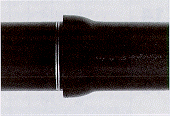 7. The plain
end of the pipe should be in reasonably straight alignment and carefully
entered into the socket until it just makes contact with the gasket. This
is the starting position for the final assembly of the joint. Note the
two painted stripes near plain end.
 8. Joint assembly
should then be completed by forcing the plain end of the entering pipe
past the gasket (which is thereby compressed) until the plain end makes
contact with the bottom of the socket. Note that the first painted stripe
will have disappeared into the socket and the front edge of the second
stripe will be approximately flush with the bell face. If assembly is not
accomplished with the application of reasonable force by the methods indicated,
the plain end of the pipe should be removed to check for the proper positioning
of the gasket, adequate lubrication, and removal of foreign matter in the
joint.
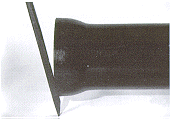 9. For joint
assemblies 8" and smaller, socketing of the plain end may be accomplished
in some cases by pushing against the face of the bell of the entering pipe
with a crowbar or spade. Large sizes require a more powerful means.
Field-Cut
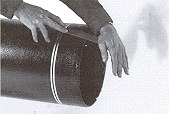 The plain end
of TYTON JOINT pipe is furnished beveled to ease its "sliding fit" with
the gasket when the joint is assembled. When necessary to field-cut pipe,
the cut end may be easily conditioned to readily accept the next joint.
Simply taper the outside cut-end of TYTON JOINT pipe at least 1/4" back,
at an angle approximately 30 degrees with the center line of pipe. This
can be done with a coarse file or portable grinder. The operation removes
sharp or rough edges which could injure the gasket, and assures proper
assembly.